Introduction:
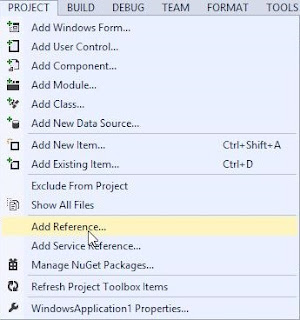
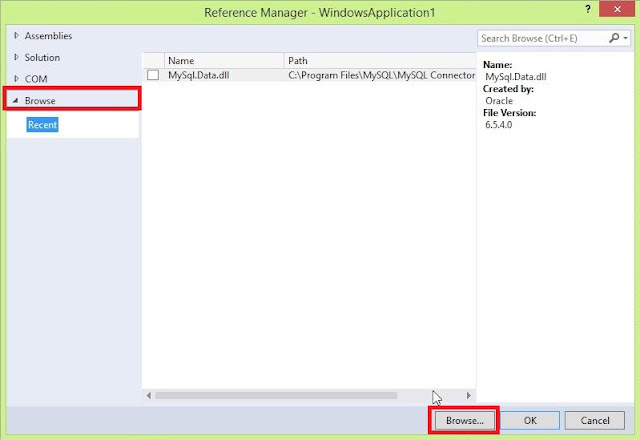
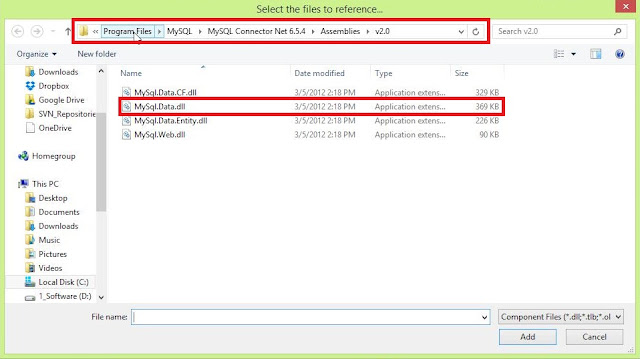
How to use MySQL with Visual Basic .NET? Watch this tutorial for basic mysql connection with visual basic .net 2013/2010/2008. Visual basic database can be anything like MS Access, MSSql etc. but if you are already working with MySQL a lot then probably you would like to use MySQL with your vb.net application. To enable vb.net application to communicate to MySQL databases, MySQL has already provided a connector .DLL that you need to import to your Visual Basic .NET application which will give all the classes and methods that you will be using to create an application in visual basic .net that connects to MySQL database in order process database related requirements of the application.
Bored with Text? Better watch the video tutorial 🙂
Target
Target of this tutorial is to establish connection to MySQL server Database from Visual Basic .NET 2010.
Software Requirements
- MySQL Server for Windows or Any other installation of MySQL Server [DOWNLOAD]
- MySQL .NET Connector [DOWNLOAD]
- MySQL GUI – MySQL Workbench or Any other GUI or any way you prefer to work on MySQL [DOWNLOAD]
- Visual Basic .NET 2008/2010/2013
Concept Requirements
- Working with MySQL
- Creating database & tables etc.
- Insert, Select, Update and Delete queries
- Working with Visual Studio
- Creating projects
- Forms and elements in Visual Basic .NET
- Basic coding
The Database
For the sake of simplicity, create a database with your IDE or whatever the way you like as vb_mysql and a table in it with the name _users with the following structure.
|
Field
|
Type
|
Primary
|
Auto Increment
|
NULL
|
|
u_id
|
BIGINT
|
YES
|
YES
|
NO
|
|
u_firstName
|
TEXT
|
NO
|
NO
|
NO
|
|
u_lastName
|
TEXT
|
NO
|
NO
|
NO
|
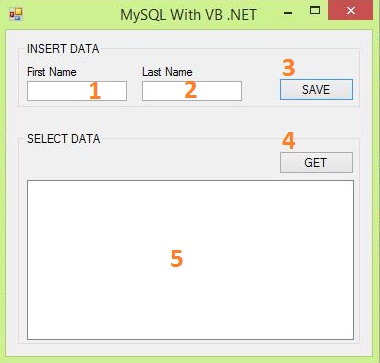
So we are done with the database, let’s create the form for the project.
|
Number
|
Type
|
Name
|
|
1
|
TEXTBOX
|
txt_firstName
|
|
2
|
TEXTBOX
|
txt_lastName
|
|
3
|
BUTTON
|
Button1
|
|
4
|
BUTTON
|
Button2
|
|
5
|
LISTBOX
|
listBox_users
|
Initializing and Connecting to Database:
Now Double-Click on the form to bring the code editor.
Above everything, write this
Imports MySql.Data.MySqlClient
This will allow us to use various types, methods and classes of the Connector.
Now, just below Public Class Form1 write the followings
Public dbconn As New MySqlConnection
Public sql As String
Public dbcomm As New MySqlCommand
Public dbread As MySqlDataReader
Here we are declaring 4 public objects that we will use.
- dbconn is the connection to the database.
- sql is a string, which will actually hold our query.
- dbcomm is the MySqlCommand that will execute the query.
- dbread is the one which will hold those data that we will fetch using query from DB.
Okay, now we are going to make the connection. We will open the connection to the DB in the load event of our form which now named as form1 by default. The code looks like the following
dbconn = New MySqlConnection("Data Source=localhost;user id=root;password=demo;port=3310;database=vb_mysql")
        Try
            dbconn.Open()
        Catch ex As Exception
            MsgBox("Connection Error: " & ex.Message.ToString)
        End Try
Here, look at the connection string which as currently have 5 parts as follows
- Data Source: We have our database in our local machine, thus I have used “localhost”, if you have your DB at some other computer connected by LAN to your machine, you will put the IP address of that machine instead of localhost
- user id: The user of the mysql database server
- password: The password of the user of the mysql database server. This is optional, if your user doesn’t have any password, you don’t need this.
- port: This is also optional, the port number for the server. I have two server running, so I used the port number to connect to the specific one. The default value for this is 3306.
- database: The name of the database in the mysql database server to connect to.
After that, in a Try..Catch block, we have opened the connection as
dbconn.Open()
This will open up the connection, if failed, then the message of the catch block will be showed.
MsgBox("Connection Error: " & ex.Message.ToString)
Run your program to see if you get the Error Message, if don’t then stop debugging and come back to IDE again. If you see the error message, then also, come back to the IDE and check if you did everything in the same way this far, try checking from bottom to top.
If everything is good then we are also good to go with saving the data to the database in the next part.
Saving Data in Database:
Double click the button with label SAVE (name Button1) to write the following codes in its click event.
sql = "INSERT INTO _users(u_id,u_firstName,u_lastName) VALUES(NULL,'" & txt_firstName.Text & "','" & txt_lastName.Text & "')"
        Try
            dbcomm = New MySqlCommand(sql, dbconn)
            dbread = dbcomm.ExecuteReader()
            dbread.Close()
            MsgBox("Data inserted.")
        Catch ex As Exception
            MsgBox("Failed to insert data: " & ex.Message.ToString())
        End Try
        dbread.Close()
First of all we are writing our SQL Query String as
sql = "INSERT INTO _users(u_id,u_firstName,u_lastName) VALUES(NULL,'" & txt_firstName.Text & "','" & txt_lastName.Text & "')"
Nothing to explain here, but in the next line in the Try…Catch block
dbcomm = New MySqlCommand(sql, dbconn)
We are instantiating a MySqlCommand with our sql and the database connection, dbconn, that we created in the form load event. In the next line
dbread = dbcomm.ExecuteReader()
We have executed the command and stored the return in the dbread, which is the declared MySqlDataReader. By this command we have opened the MySqlDataReader dbread. We can not use this opened mysql data reader anymore to store the return of any other mysql command unless we close it. So that’s what we do in the next line
dbread.Close()
After that, we have displayed a message to show that the data has been successfully inserted without any error.
However, if any of this goes wrong, we have a message to show in the Catch block which will tell us what has gone wrong.
So, now you can run your program and try putting something in the txt_firstname and txt_lastName TEXTBOX and then clicking on SAVE to see which message appears. If the error message appears, this means the data wasn’t saved, else means the data has been saved successfully.
Data is saved, but of no use if can not pull the data back for processing, right. Move on to the next part.
Get Data from Database:
To get the saved names back from the DB, double click the Button2 button and write the following codes in it
listBox_users.Items.Clear()
        sql = "SELECT * FROM _users"
        Try
            dbcomm = New MySqlCommand(sql, dbconn)
            dbread = dbcomm.ExecuteReader()
            While dbread.Read
                listBox_users.Items.Add(dbread("u_firstName").ToString() & " " & dbread("u_lastName").ToString())
            End While
        Catch ex As Exception
            MsgBox("Problem loading data: " & ex.Message.ToString)
        End Try
        dbread.Close()
First of all we are clearing the listBox_users to list the names that will be pulled out from the mysql database
listBox_users.Items.Clear()
Then we have written the SQL Query string to pull out everything from the _users table. Then we started a Try…Catch block to start processing the query.
dbcomm = New MySqlCommand(sql, dbconn)
dbread = dbcomm.ExecuteReader()
Description of the above two lines are same as it was in the Button1 event.
But after that, we have started a while loop as
While dbread.Read
                listBox_users.Items.Add(dbread("u_firstName").ToString() & " " & dbread("u_lastName").ToString())
            End While
Here we made a loop which will run until our mysql data reader, dbread, has data. In each loop we add one user name from dbread to our list listBox_users.
After that, we have closed the dbread. In the Catch block of this Try…Catch block we have showed a message regarding the data reading process’s failure though we don’t think that this will come up if you have done what you have been instructed to.
So that’s it, all done, we connected to DB, saved data and also pulled back data from DB. In the last part, we will get the full source code and will download the project to see things in action.
Okay, so the full code is supposed to look like the following
So now, run your program again and click the GET button and the list on its left will be filled up with the names you have inserted earlier.
Let me know if you are facing any issue implementing this tutorial. Please come up with screenshot of the error message or bugs so that I can see what’s going on.
You can download the Application also, click on the following link.


